Wednesday, August 25, 2010

The Wedding Cake Chronicle - A Reflection

Remember all those supplies and ingredients?
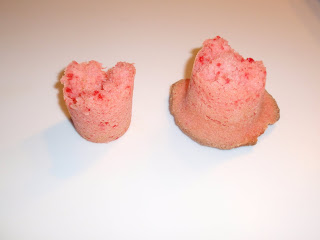
Can you believe after about 24 hours of baking, decorating and delivering... this is result?
Reflecting back on the experience, here are some of my random thoughts....
  • Dummy cakes are a great way to practice decorating, the fun part!
  • Schedule? Organization is the best plan but be flexible. And unless you have been doing this for a while prepare for things to take twice as long as you think they will.
  • 24 hours is a long time!  This cake basically took over my life for a week!
  • I don't regret doing this cake but I still haven't changed my mind about doing more wedding cakes. :)

Thanks for following 
The Wedding Cake Chronicle,
I hope you enjoyed it!


Monday, August 23, 2010

The Wedding Cake Chronicle - The Feedback

So the wedding cake is done and delivered.  I assume no news is good news.  If there were a problem I'm sure I would have heard right away.  It's difficult to wait for feedback from a wedding cake, I think the cake looked good but you never know what someone else will think of your work.  On Tuesday after the wedding I receive an email from the bride....
I just wanted to let you know how pleased I was with the cake!!! I loved loved loved it! It was exactly what I wanted, not to mention it was delicious!
You do beautiful work. Thank you so much for everything!
OK, now I can feel good.  My only goal is that the bride loves the cake.  Success!

Sunday, August 22, 2010

The Wedding Cake Chronicle - Part 7

Delivery day!

I wake up feeling good.  But still nervous, the venue for the reception is 50 minutes away.  Anything can happen.

I look over the cake and think it looks pretty good. 

Time to get things ready for the delivery.  I put together the shipping boxes.  Put a clean sheet in the back of the SUV and start gathering my last minute materials.

Bows and a piping bag already filled with icing for attaching the bows.  Hopefully this is all I will need, but just in case.....extra fondant and icing, decorating comb, spatula, extra bow, shortening, gum glue, and fondant roller and cutter.

This cake is heavy!  I cannot carry it alone.  Thankfully Doug is helping.  We load the cakes in the SUV at about 11:30am.  Don't forget the camera.  And off we go!

The ride is all highway, but oh my goodness, it is BUMPY!  All I can do is watch my cake jiggle and hope that nothing happens.  I know the support system is stable but it is possible that a crack happens and part of a tier collapses.  There is a little settling of the cake but there really isn't anything I can do about it.

We arrive at the venue at about 12:30pm and I scope out the room and how we are going to get the cake to the room.  I walk into the reception room and it looks beautiful!  All white, very elegant.  I find someone and ask which table is mine.  She points to this very small table right in front of the wedding party table almost in the center of the room.  I say "I don't think that is going to work, I have three cakes"  She looks confused but proceeds to find a larger table for me. 

We have two choices for bringing the cake to the room,  a long sloping ramp or a large set of stairs.  Doug feels he can carry the cake up the stairs, so stairs it is.  We grab a cart and head outside to get the cake.

I don't know if you noticed what I wrote above...the cake table was almost in the center of the room!  Of the four wedding cakes I have done I have never had a cake in the center of the room.  I feel a little nervous because the cakes definitely have a back side.  And this is the side that is facing the bride and the groom!  Had I know this was going to be the layout, I would have placed bows on both sides of the cakes.  But I don't have enough fondant available or extra bows to do this at this time.  Note to self:  ask where the cake will be displayed, even for party cakes.

We set up the three cakes on the larger table and I attach the bows.  I step back and think the overall presentation is beautiful.  I am happy.  Here it is....

My part is done.  We stay in the area for lunch and some shopping.  I keep checking my phone for messages until the 4pm reception time just in case something happened.  No calls, all I can do now is wait for feedback from the bride and groom. 

Best Wishes Tony and Lindsay!

Saturday, August 21, 2010

The Wedding Cake Chronicle - Part 6

Get ready, it's going to be a long day.  Started at 10am this morning.  Leveled, torted and crumb coated the 12", 10" and 8" squares.  Didn't get to the 14" because I forgot to buy cake boards big enough. 

Tried to clean up the bows with shortening but the first one started to crack so I decided to wait.

Stacked the dummy cake I iced yesterday.  I used long wooden skewers to hold the two tiers together.  Not sure if I'm happy with it but we'll see if I have time to redo. 

It's about 1pm and I'm off to the store to pick up some larger cake boards so I can work on the 14".

OK, break time is over.  Had lunch, bought cake boards, and did some cleaning up in the kitchen. 

It's 3pm and time to start with the 14".  Torted and crumb coating done.  For future reference, consider not splitting cakes over 12" just stack two 2" layers.  They are too large and fragile to handle at 1" thick!

Sorry I don't have photos for today, I was behind, stressed, and completely forgot to take photos!

I start icing the cakes.  Based on the dummy cake I previously did I decided to make the icing fairly thin.  Big mistake! 
I spend the next 6 hours...yes i said 6 hours... (with a 1 hour break for dinner) making icing batches and icing the 4 cakes and remaining dummy cake.  I was just trying to get it too perfect.  The OCD in me is making my life miserable! 

I finally realize that once the icing crusts it's best to just leave it alone.  I decide it is a good as I am going to be able get it and move on to stacking. 

Doug was gracious enough to help me stack the cakes.  He has a great eye for centering the cake plates.  For those that don't know, this involves using 4 pillars for each tier, measuring, inserting them in the cake and using a plastic separator plate with feet that fits into the pillars.  The next tier is then placed on the plastic plate.  I try to find the two best sides of each tier and arrange them on the same side of the stacked cake.  I think this cake will definitely have a back side.  It took about 1 hour to stack the cakes.  I also stack the second dummy cake.

It's 10 pm and honestly, now comes the fun part.  The decorating is when the cake starts to come together.  This is when I get into a zone and really don't mind what time it is. But.....

At this point I'm thinking this cake looks like crap!  I refuse to take a photo.  Although I should have to show you how not to freak out at this point.  It WILL get better.

I fill in the gaps between the plates with icing, roll out some fondant and add a 1" strip of purple fondant around the bottom of each tier.  Looks better already!

Next comes the tails of the ribbons.  I roll out some more fondant, cut 2.5" wide strips and place them on the corners of the cakes flowing down the sides.  I wish the cake was fondant so I could place some paper towels under the strips to create more "flowing" but I do the best I can.  Wow, that was pretty close, I only have a small amount of fondant left!

I use shortening to clean up the bows.  They will go on at the venue. 

That's it! 

It doesn't seem like it should have taken that long but it's now 1:22am.  I'm going to bed.  Oh my, my feet and back are so sore!

Good night!

Thursday, August 19, 2010

The Wedding Cake Chronicle - Part 5

So it's Thursday and it's time to get cracking on this to do list.  I'm actually a little (OK a lot) behind where I'd like to be at this point.  But even after a long day at work I'm feeling energized.

I finished all my baking tonight, two 10" vanilla cakes and two 8" strawberry cakes.  Another 3 hours of baking time.   

I also finished bows, which really only consisted of figuring out how I was going to join the two halves together.  Many time the bows lay flat on top of the cake and there is no need to tie them together, but this design calls for the bows to sit vertically on the corner of the cake.  I decide to use a strip of fondant that is wrapped 1.5 times around the center of the bow and glue everything together.


You can see how much the color faded when the fondant dried, the center ties are a little darker because they aren't dry yet.  Once they are dry I will rub them with some shortening to remove the powdered sugar and any small imperfections on the surfaces.  I set them in front of a fan for the night.

Again I attempted to ice a dummy cake.  This one actually turned out OK.  But it took a long time for me to figure out how best to use the decorating comb to get clean lines in the icing.  And I had to realize that EVERY line was NOT going to be perfect.  I hate being a perfectionist!

Tomorrow is crunch time but I'm feeling OK and very glad that I took a vacation day for Friday.  Time to get a good night's sleep.

Wednesday, August 18, 2010

The Wedding Cake Chronicle - Part 4

Started baking at 7pm again tonight. 

Baked a 14" strawberry and found out what happens when you try to to remove the cake from the heating core too soon!


Oh well, it's still enough to plug the cake so I'm ok. 

I also bake a 12" vanilla.  While these are baking I do some cleaning and organizing, but basically I don't make much progress on the rest of the cake. 

I was tentatively planning to take a vacation day from work on Friday in case I'm behind.  At this point I'm thinking I'm in good shape but I'll take the day off to make my life less stressful.  Will it work?

Tuesday, August 17, 2010

The Wedding Cake Chronicle - Part 3

It's Tuesday and I'm already behind...

Home from work at 5:30pm.  Relax for 5 minutes.  Dinner.  Begin baking at 7:15pm.  First up...a 14" square strawberry cake.  This is actually the first time I am using my square pans and a heating core.

The heating core helps the cake bake more evenly and eliminate the dome in the center.  The core is placed in the center of the pan, the batter is poured around it and the core is filled halfway with batter.  After baking you have a cake "plug" to fill the hole where the core was. 


With square corners I always worry about the corners getting dry and/or burnt while the center is still cooking.  Just think about those rock hard brownies from the corner of the pan :)  I must say the heating core worked very well and I am a fan!


I also bake a 12" square vanilla cake.  My oven is only large enough to bake these sizes individually, so it takes about 3 hours to prepare the pans, prepare the batters and bake tonight.

While these two cakes were baking I decided to start on a dummy cake.  I make a batch of icing and begin icing the styrofoam dummies and practicing with the decorating comb.  Being the perfectionist that I am I quickly realize that this will be a practice cake :(  After a few more attempts I decide to clean off the styrofoam and start again tomorrow.  It's 9:30pm and I'm done for tonight.

Monday, August 16, 2010

The Wedding Cake Chronicle - Part 2

OK, it's Monday night and according to plan the following should be done already....

cake platters - check
make bows - um...no excuses...just haven't been in the mood to work with gumpaste
and tonight I should be working on dummy cakes

So I guess I will work on my bows because they need time to dry.  I ordered a 2lb bucket of purple fondant ahead of time because coloring large amounts of fondant can be lots of work.  To start I added 1lb of white gumpaste to 1lb of purple fondant.  The resulting color was actually very close to the swatch I received from the bride.  Fondant colors usually fade slightly as they dry so I figured it would be just right after it dried.

I used the foam dummies to estimate the size of bow I wanted and cut some templates from paper.  The fondant was rolled using my pasta roller attachment on my Kitchen Aid.  It worked beautifully!  Each side of the bow was stuffed with paper towels to keep the shape and allowed to dry.  As usual I made one extra because you never know!


It's hot, it's late, I'm tired and I choose not to work on the dummy cakes.  A mistake?  We'll see....

Wednesday, August 11, 2010

The Wedding Cake Chronicle - Part 1

If you know me you know I like lists.  I have made lists of cake supplies, groceries and a game plan.  And here it all is!


Homemade cake platters (thank you Doug!)
Silver foil to cover the cake platters
4 styrofoam cake dummies
plastic cake separator plates
cake boards
pillars
cake pans
baking strips
heating core
cake release
cooling racks
saran wrap
18 cake mixes
54 eggs
6 cups vegetable oil
raspberry jam (seedless)
14 cups shortening
4 boxes of Dream Whip
30 tsp vanilla
20 lbs of powdered sugar
fondant
gumpaste
pasta roller
gumpaste tools
measuring cups
measuring spoons
scale
spatulas
piping bags
foam roller
turntable
levelers
boxes for transport
saran wrap
and most importantly...
MY GAME PLAN! 

This cake design is a total of 3 tiered cakes.  A center cake:  14", 12", 10" and 8" squares of strawberry cake with vanilla filling and vanilla cake with raspberry jam filling.  Because the bride wanted the look of three cakes but only needed about 200 servings, the two side cakes are actually dummy cakes, styrofoam covered with icing and decorated.  Each cake will have a fondant lilac bow.

Knowing that I have to start baking when I get home from work a game plan is essential.  I don't want to spend time thinking about what I am going to do, I just want to do it.  Here is what my game plan looks like

Weekend before:
   Make cake platters
   Make bows

Monday
   Dummy cakes

Tuesday
   Bake 14" x 2" strawberry
   Bake 12" x 2" vanilla
   Bake 8" x 2" strawberry

Wednesday
   Bake 14" x 2" strawberry
   Bake 12" x 2" vanilla
   Bake 8" x 2" strawberry

Thursday
   Bake 10" x 2" vanilla
   Torte/ice 14" tier with buttercream
   Bake 10" x 2" vanilla
   Torte/ice 12" tier with raspberry

Friday
   Torte/ice 10" tier with raspberry
   Torte/ice 8" tier with buttercream
   Stack
   Add fondant ribbon
   Add bows?

Saturday
   Delivery at 1pm

Chances of staying schedule?  because I am writing this a few days after I know the answer but even so I would have guessed - slim

Tuesday, August 10, 2010

The Wedding Cake Chronicle - Intro

This weekend I will be completing my last wedding cake.  If you read my earlier post, I decided wedding cakes are just too stressful for me as a hobby baker.  But I agreed to this cake earlier this year and I can’t go back on my word.

As I was putting together my game plan for this wedding cake I decided it might be fun(?) to chronicle my activities during the week leading up to the cake delivery.  So if you are thinking about doing a wedding cake and want to see what’s involved (from a hobby baker's perspective), or just want to share in my pain joy, be sure to stay tuned….

Monday, August 9, 2010

Watermelon Cake

A coworker asked me to make this fun cake, from Woman's Day magazine, for a family picnic.  It was really a last minute request and she needed it for right after we returned from July 4th vacation so I didn't have too much time to think about it.  If I had I would have done it a little differently.

20100707 P7070082

Originally the cake was supposed to be upright on the rounded edge, but the cake and the frosting were just too soft.  The directions said to cut the round cakes in half, stack, then turn on its side.  So that's what I tried to do.  Even though I was wondering what's to stop these layers from separating and falling apart?  Fondant might have worked but I think it was too humid for fondant too.  So the cake ended up as shown.

If I had just thought about it for a moment I would have stacked a rectangular cake and cut the curve out from the bottom.  That way the layers would have been stacked horizontally instead of vertically.  I got caught up in the directions that were presented to me and should have used my experience to look at the cake a design a better solution.  Well, at least now I know not to blindly follow someone else's suggestion without thinking about first.  I guess that's a good lesson for lots of things in life!

In case you are wondering I used chocolate chips for the "seeds".  Again if I had actually looked at some watermelon pictures I may have chosen to pipe those on with frosting but it was a "fun" cake so I'm OK with the chips.

One last thing that hit me while I was trying to fall asleep after making this cake.  Can you guess what it is?

Look closely......

I'll give you a moment....

The stripes on the rind are going the wrong direction!  Apparently none of the guests noticed this either.  Phew!  And here I go pointing it out!  Oh well, nobody's perfect.

I hope you are having a great summer!  Now go enjoy some watermelon...or cake.

Friday, August 6, 2010

Jaymi's Graduation Cake

Another graduation cake for a co-worker's daughter. 
Bright pink and purple. 

20100716 P7160084

This is a 10" round, a 6" round and a mini wondermold cake with buttercream frosting.  Only the mortarboard and tassel are gumpaste.  So maybe buttercream isn't the right term, icing it a better term because this recipe has no butter.  I had to find a recipe that could handle the crazy heat and humidity we have been having and this is recipe has worked out great!

Roses are still my nemesis.  I wanted to make the roses colored with white edges on the tips but my icing was too soft and the petals fell flat and spread.  So I added sugar to stiffen the frosting but the roses were much harder to pipe.  I had to practice so much that I gave up on the white edges.  I finally got enough roses that I was happy with and called it done. 

Congratulations Jaymi!